How to Use Scenes and Sources in TikTok LIVE Studio
2026-03-07
How to Use Scenes and Sources in TikTok LIVE Studio
Scenes and sources are the foundation of building a desktop stream in TikTok LIVE Studio. If you understand this system, you can move beyond a single camera feed and start creating layouts that match your content type, whether you are chatting, showing your screen, streaming gameplay, or combining multiple visual elements.
Scenes define how your LIVE is organized, and sources are the pieces you place inside those scenes.
What a Scene Does
Scenes are the place where creators build the LIVE view. For non-gaming creators in particular, scenes are designed to display LIVE content using combinations of effects and sources.
You can think of a scene as a layout container. It holds the visual arrangement you want viewers to see at a given moment.
Several scene types are available:
- General
- Chat
- Fill to Screen
- Dual Camera
- Blank
Each one serves a slightly different use case.
The Main Scene Types
General
The General scene includes common sources such as camera capture, display capture, goals, and alerts. This is the safest default for many creators.
Chat
The Chat scene shows only the camera and goal. This works well when the person and audience interaction are the main focus.
Fill to Screen
This scene emphasizes display captures, cameras, goals, and alerts in a cleaner full-screen style.
Dual Camera
This scene displays two cameras. It is useful for creators who want a second device view or an additional angle.
Blank
A Blank scene starts with an empty canvas so you can build the layout yourself from scratch.
What a Source Does
If a scene is the layout container, a source is the content element you place inside it.
You can add up to 20 sources to a scene. That gives creators a lot of flexibility without making the system completely open-ended.
This is the core idea:
- create or choose a scene
- add the sources needed for that moment
- arrange them visually in the preview
- switch scenes when your content changes
The Most Important Source Types
There is a wide range of source types available. The most important ones for beginners are below.
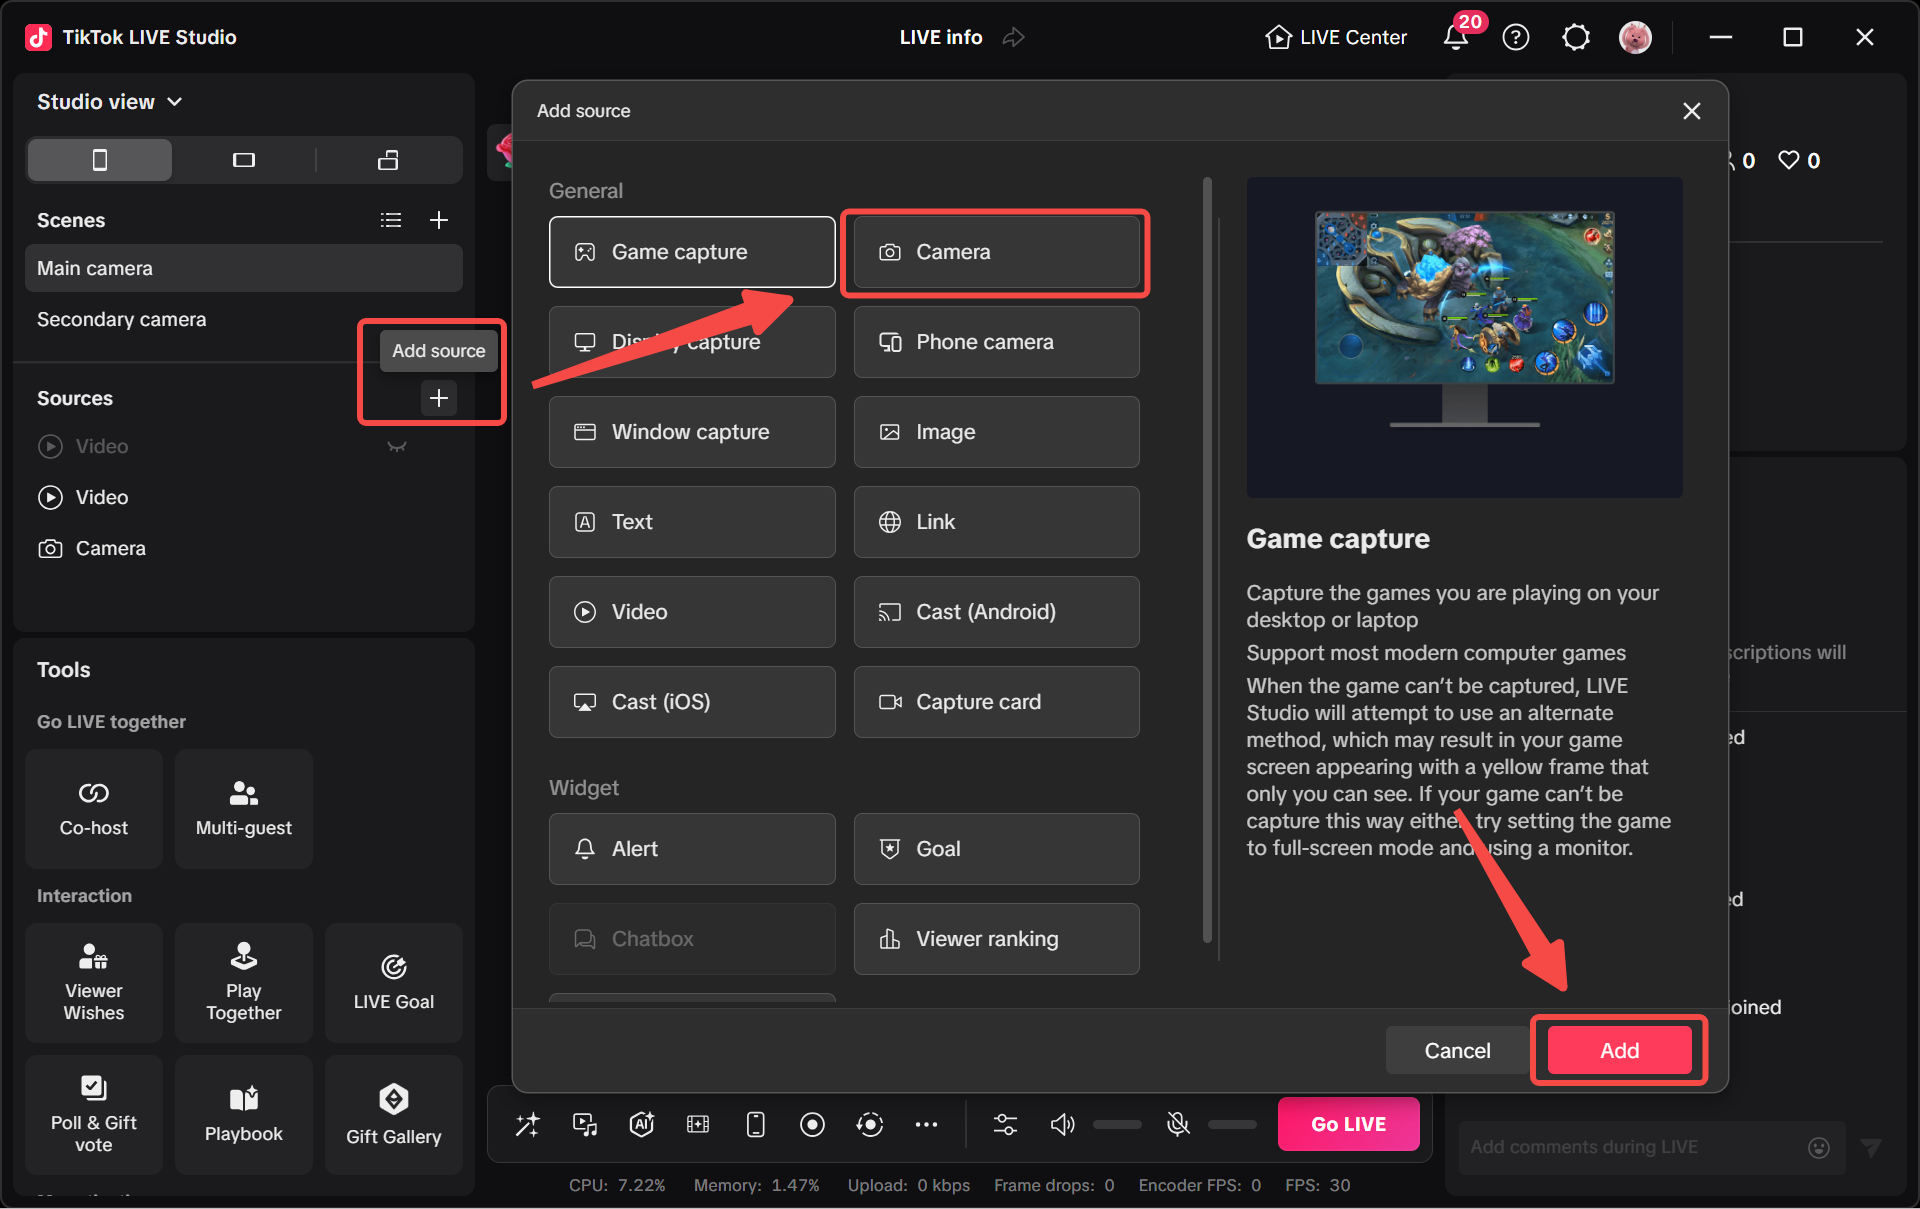
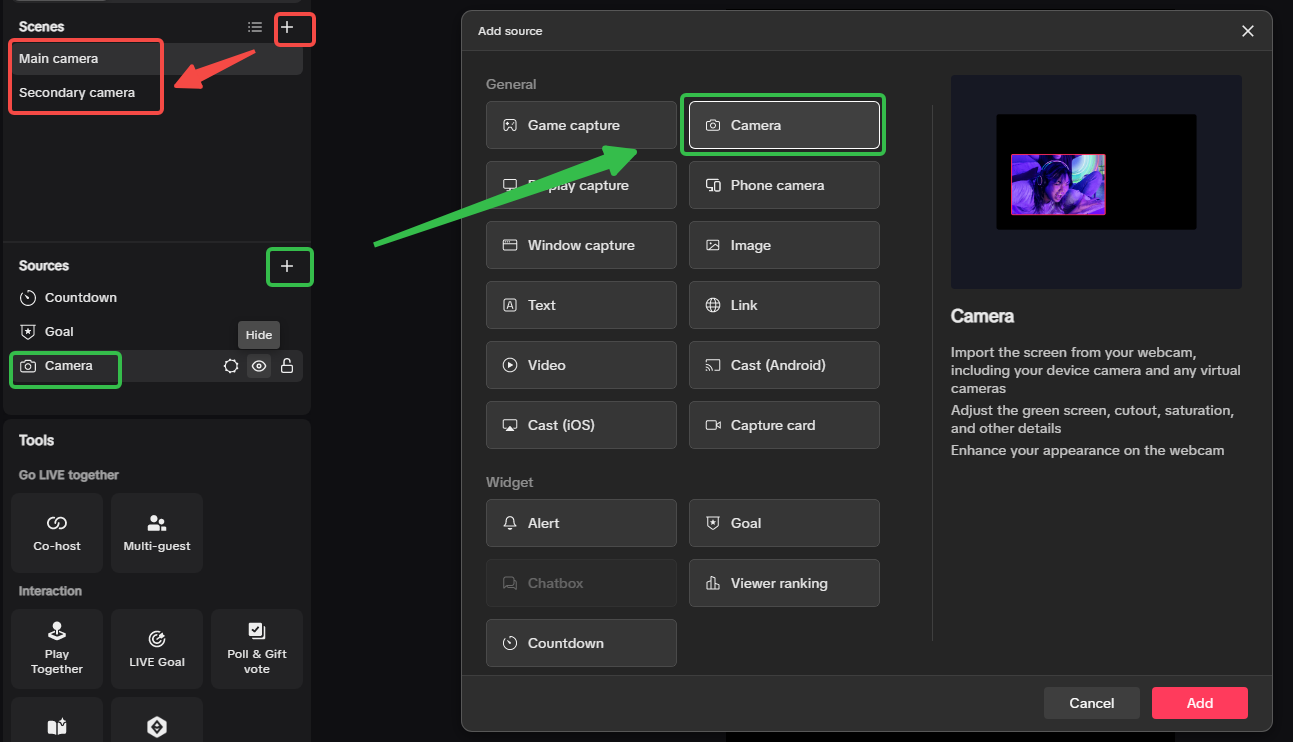
Camera
The camera source captures your camera image and places it in the LIVE preview. The source supports positioning, rotation, and flipping. You can also switch between multiple cameras and adjust settings like exposure, contrast, and balance.
Display Capture
Display capture shows your entire desktop. This is useful for tutorials, presentations, and general screen-sharing.
Window Capture
Window capture shows only one application window instead of the full desktop. The window should not be minimized when you use it.
Game Capture
Game capture is intended to capture gameplay at higher video resolution than desktop capture when supported by the game. If it does not work for a specific game, try display capture or window capture instead.
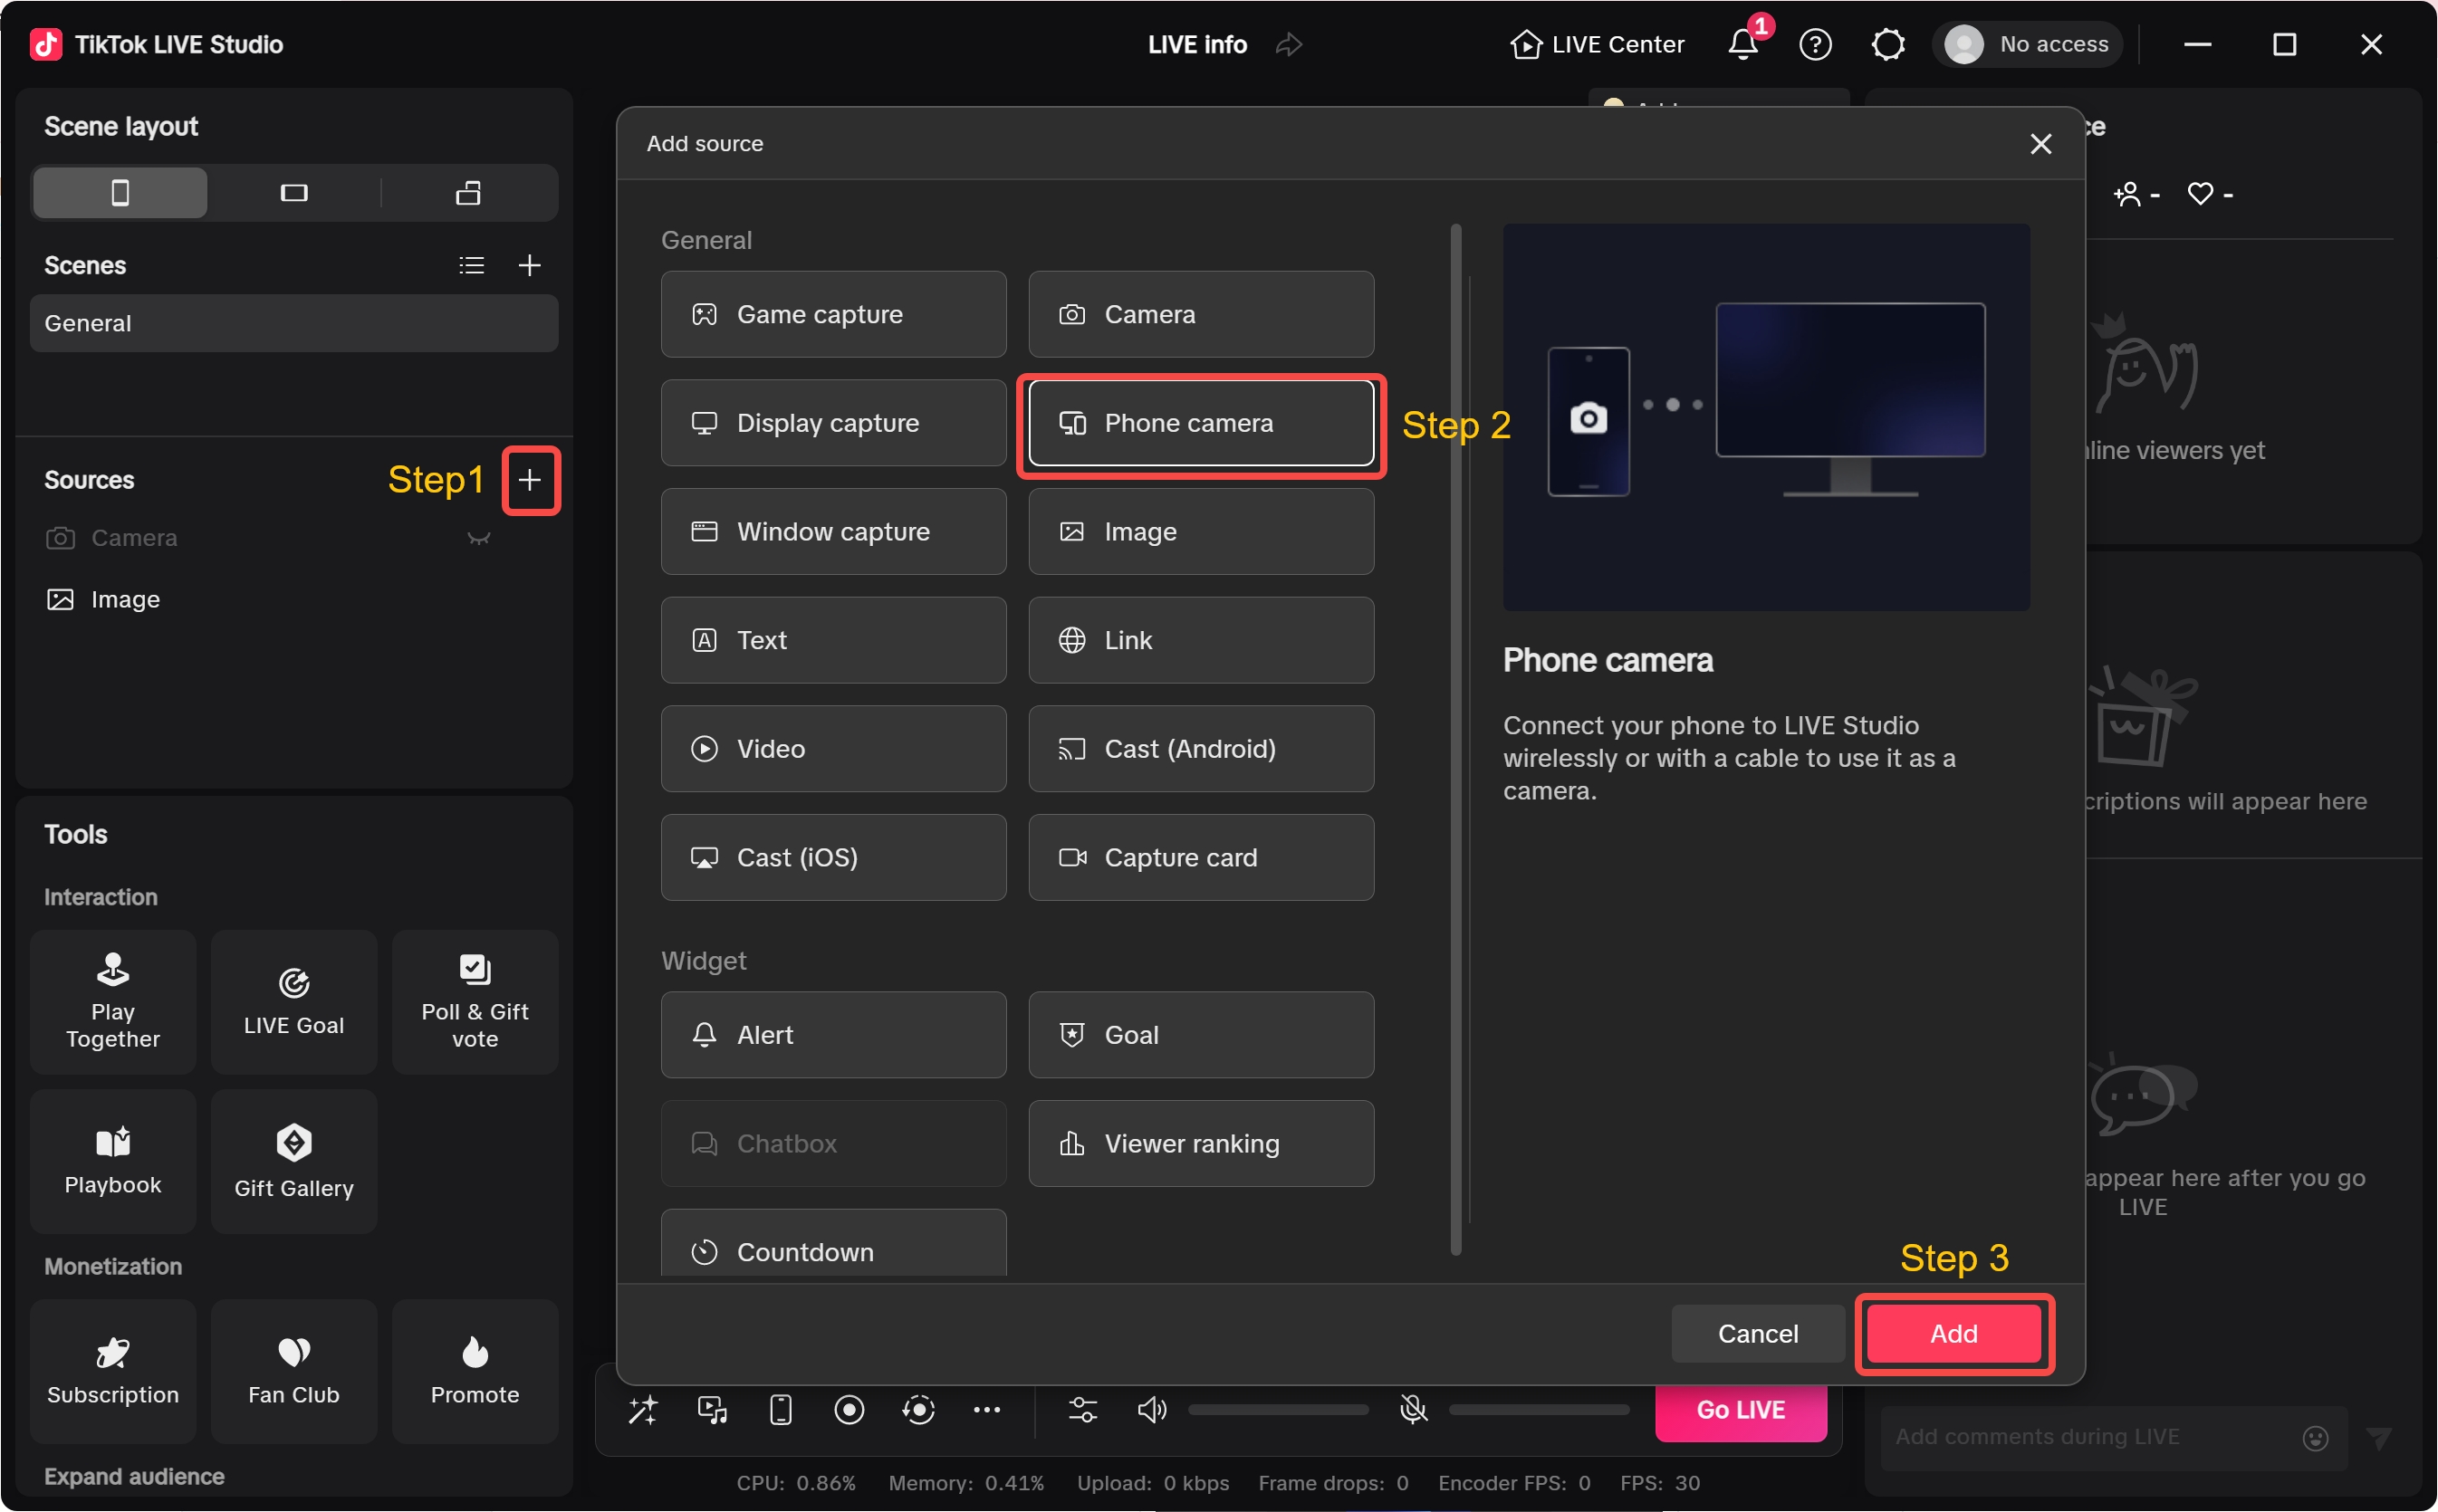
Phone Camera
You can connect a phone camera either by Wi-Fi or USB cable. Open LIVE Studio, scan the QR code, connect the phone, and then add it as a source.
Additional Sources That Improve Production
Once the basics are in place, more source types can help build richer streams:
- Image source for custom images
- Text source for on-screen text
- Link source for customized links
- Video source for custom videos
- Cast for showing a mobile screen through WLAN
- Capture card for external video and audio captured by the card
- Alert to surface follower, gift, or subscription events
- Goal to display follower or gift goals
- Chatbox to show comments and notifications
- Viewer ranking to highlight top contributors
- Countdown to add timed anticipation inside the stream
This range is why scenes and sources are so central. They let you turn a simple stream into a more structured viewing experience.
How to Build a First Working Scene
For a beginner setup, a simple first scene can look like this:
- create a General scene
- add your Camera source
- add Display Capture or Window Capture if you need screen content
- add Text or Goal only if they support the stream clearly
- preview the layout and adjust placement before going LIVE
This approach is better than adding too many sources at once. Start with a simple working layout, then add complexity only when it supports the stream.
The dual-camera example is a good reminder that scenes and sources work together: you can create separate scenes for different camera angles, then use source controls inside each scene to keep the layout clean and easy to switch.
Best Practices for Using Scenes and Sources
Match scene design to content mode
If you are mostly talking, a general or chat-focused layout is usually enough. If you need multiple cameras or content types, build separate scenes for each use case.
Keep sources purposeful
Just because LIVE Studio supports many source types does not mean every stream needs all of them.
Use scene switching intentionally
Scenes are most useful when they map to clear moments in your stream, such as:
- intro
- main talking view
- screen-share demo
- two-camera segment
- ending or call to action
Test unsupported capture cases early
Some games may not support game capture. Always test fallback options such as display capture or window capture before the stream.
Summary
Scenes and sources are the core building blocks of TikTok LIVE Studio. Scenes control the layout of what viewers see, while sources are the camera feeds, screen captures, widgets, and media elements placed into that layout.
If you learn this system well, you can move from a basic one-camera LIVE to a more intentional desktop production workflow without making the product feel overwhelming.
What to Learn Next
After scenes and sources feel familiar, the next steps are:
- How to build a dual camera setup and use a phone camera for more flexible angles
- Chat, recording, preview, and hotkeys for smoother stream control